
What you will accomplish
When you receive a phone call, if you're not available the caller hears a recording asking them to leave a message. If the caller leaves a message, the audio file is downloaded to a specific folder. When you are available, the call is forwarded to your real mobile number.
TL;DR: View full code
What you need to follow this guide
- A 46elks account
- A virtual phone number with voice capabilities
Steps
Setup a Flask project
If you're new to Flask, see how to set up your first Flask app here. Make sure your virtual environment is activated
and your Flask app is running with flask run.
Folder structure
Create a folder namedstatic. This is where you place your pre-recorded message. Feel free to use our [pre-recorded message].
Create a second folder caller-messages.
Messages from callers will be downloaded and stored in this folder.
The file structure should now look similar to this:
Set up and initiate your local server
In this tutorial we'll use NGROK as a listening server for the app.
In another terminal, initiate NGROK with ./ngrok http 5000 to have it listen on the same port as Flask.
New to NGROK? Find a quick-start guide for NGROK here.
A different local server than NGROK is totally OK to use, just make sure to initiate it in another terminal to listen for your Flask app on port 5000.
Set up the first route
The first route is for incoming calls where you compare the day and time the call comes in to your available hours. In your code editor, edit app.py so it looks like the below but with your details where there's comments, "#".
What you’ve done here is to import the native Python modules JSON and datetime. You’ve also set a base URL, which is the URL from your local server setup in this case NGROK. And you’ve set up a Flask endpoint /incomingCalls to which a POST request will be made when a call comes in. At the endpoint you check:
- If the day and time are within Monday to Friday between 8 in the morning and 5 in the afternoon (17)
- If both statements are true the call is connected to your specified phone number
- If one, or both, date/time statements are false the caller hear your recording where they’re asked to leave a message
- If the caller does leave a message your app continues to the next route /recording
Set up the second route
Time to set up the second route, /recording, where the recorded message from the caller gets downloaded and an SMS sent.
First, stop your Flask app with Ctrl + C.
To make the request to download the audio file we need a Python library called Requests. Install Requests with:
At the top of your app.py file, import the Requests library and also the Flask built in request module.
The top of your code should now look like this:
Below your /incomingCalls route add the below code. Remember to add your details where there's comments, #.
Here you’ve added your API-credentials, which are needed for authentication, and created another Flask route where you:
- Get the URL of the recorded message from the caller
- The URL is passed on to the download function where you make an authenticated request to download the audio file to your “caller-messages” folder
- When the download is finished the function to send an SMS is invoked
- In the SMS function you get the phone number and time of the call which are passed to the message part of the SMS that is sent
Configure your virtual phone number
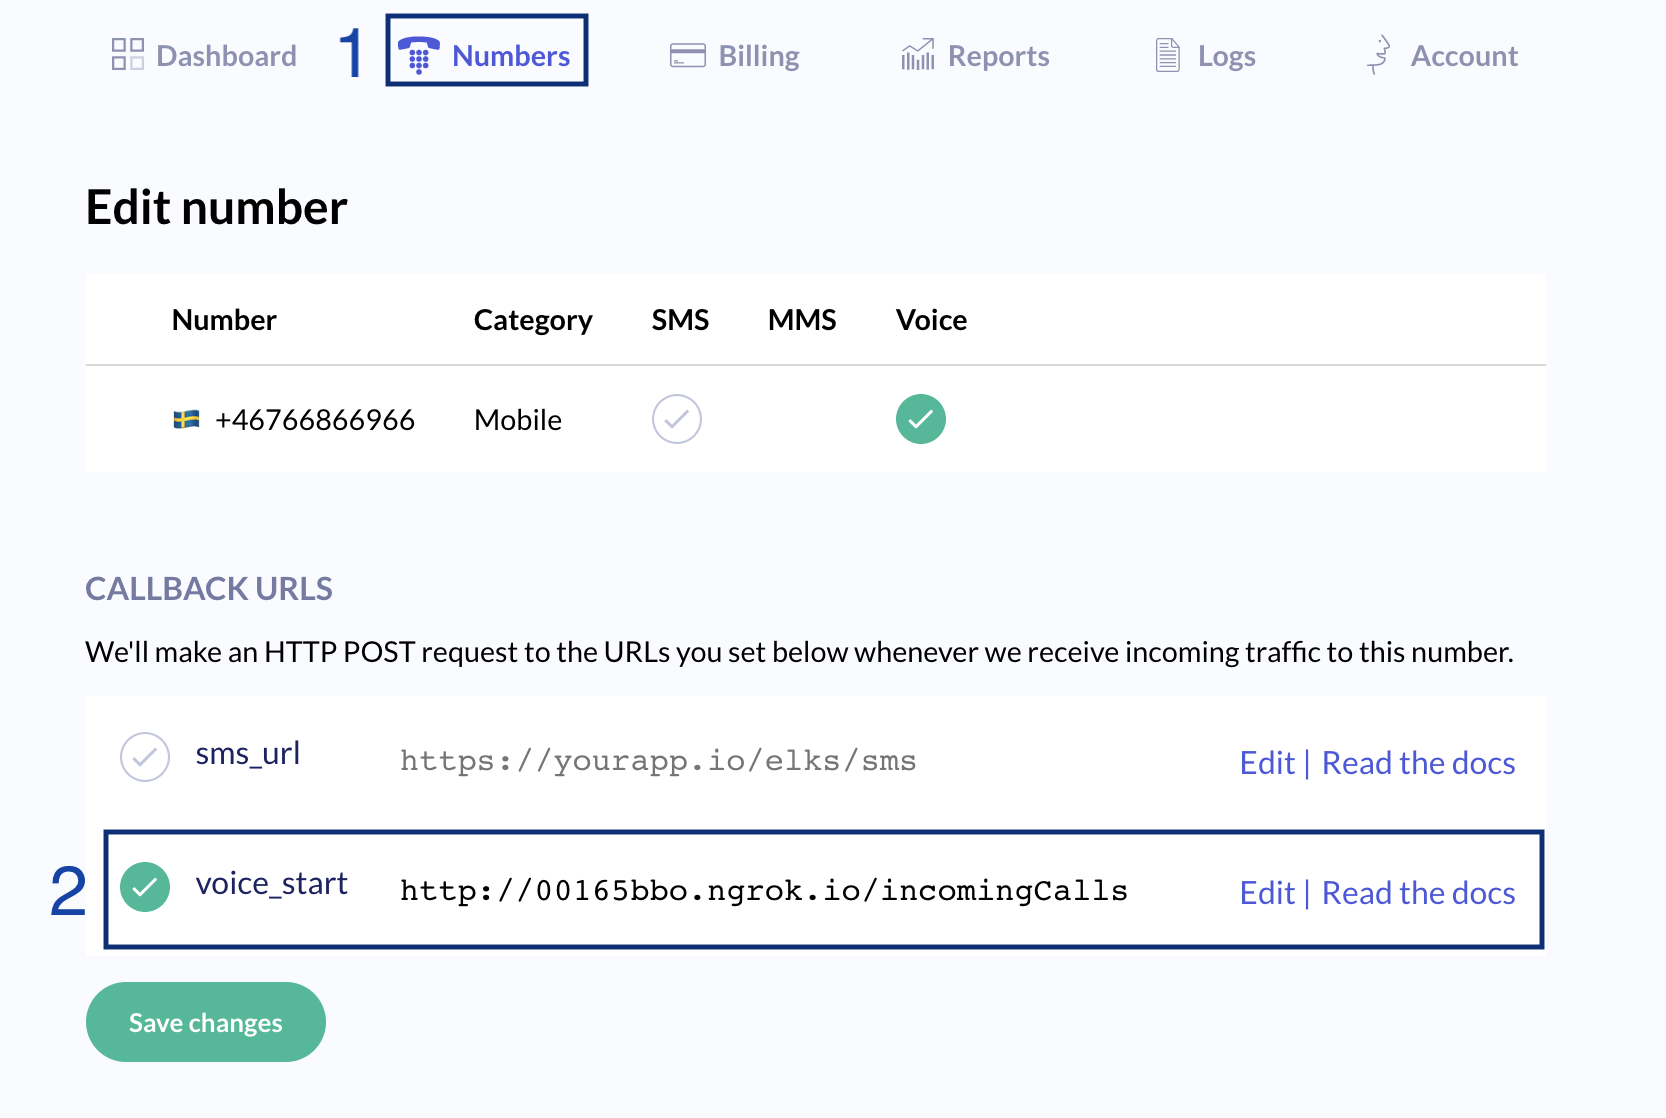
To test your app, you need to configure your 46elks virtual phone number's callback URL for voice_start. This is the URL to where the 46elks API
will make a POST request whenever you receive a phone call.
Follow our guide on how to configure voice_start and add the URL to your local server. The configuration could look something like this:
Time to test your app
You should now be able to test your application.
- Initiate your local server or NGROK tunnel if you haven't already
- Initiate your Flask application
- Call your 46elks number to test
What success looks like
In this test we’ve changed the available hours so that an SMS will be sent.
Below are two example terminals.
The first shows the terminal running Flask and the second is the NGROK server.
As you see the 46elks API makes a POST request towards each endpoint in your app, first /incomingCalls where it gets your audio file to play for the caller,
and finally /recording where the message left by the caller is downloaded and an SMS is sent to you.
The same can be seen in the terminal with NGROK.
If you’ve made the same test the result should be that you’ve been able to call your 46elks virtual phone number,
have listened to your recording and also left a message. The message should have been downloaded to your “caller-messages”
folder and an SMS should have been delivered to your mobile.
And that's it. Now you have your own answering machine app, well done! 🌟
Deploy your app to production
To make the most out of your answering machine it should be running all the time on a server (production). Since deploying to production is a whole tutorial of it’s own we’ll point you in the right direction with a couple of good resources:
- Before placing your app anywhere other than on your computer, you need to move your API-credentials away from app.py and into a .env file, see how in this guide.
- If you don’t already have a server we recommend using Digital Ocean. To get started, see how to set up your server in this guide, and how to serve your Flask app on the server with this guide.
Need some more help or have suggestions?
In case you bump into any problems, or have suggestions, you’re more than welcome to contact us - we’re happy to help!
Full code for reference


